You can read and send your Texo email straight from your existing Gmail account on the web. Gmail collects your mail over POP3 and sends through your Texo SMTP server. Replace yourdomain.co.za with your own domain and use your full email address as the username.
- Incoming (POP3): mail.yourdomain.co.za · port 995 · SSL.
- Outgoing (SMTP): mail.yourdomain.co.za · port 465 · SSL.
- Username: your full email address · Password: your email account password.
Good to know: Gmail's web importer uses POP3, which downloads your mail into Gmail rather than keeping it in two-way sync. If you'd rather your mail stay synced across all your devices, set the account up in a mail app using IMAP instead — see the other email setup guides.
Step by step
- In Gmail on the web, click the gear icon (top-right) and choose See all settings.

- Open the Accounts and Import tab.

- Next to Check mail from other accounts, click Add a mail account.

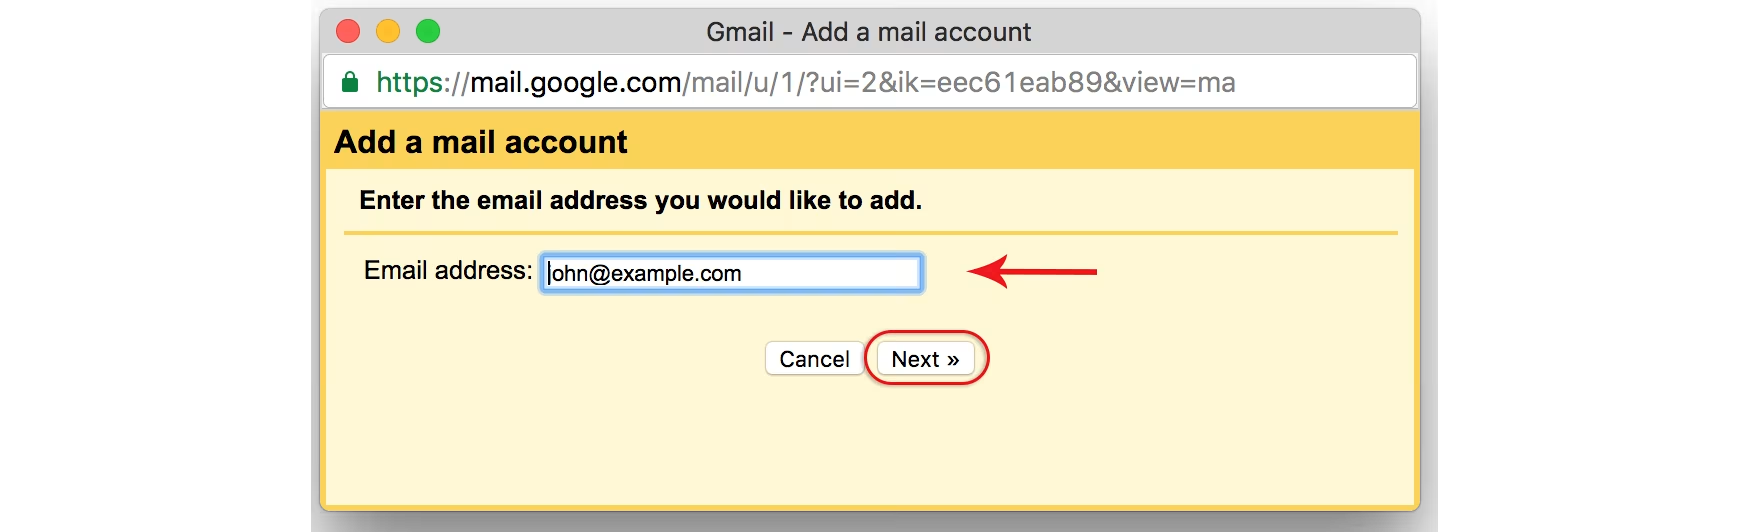
- Enter your full Texo email address and click Next.
- Choose Import emails from my other account (POP3) and click Next.

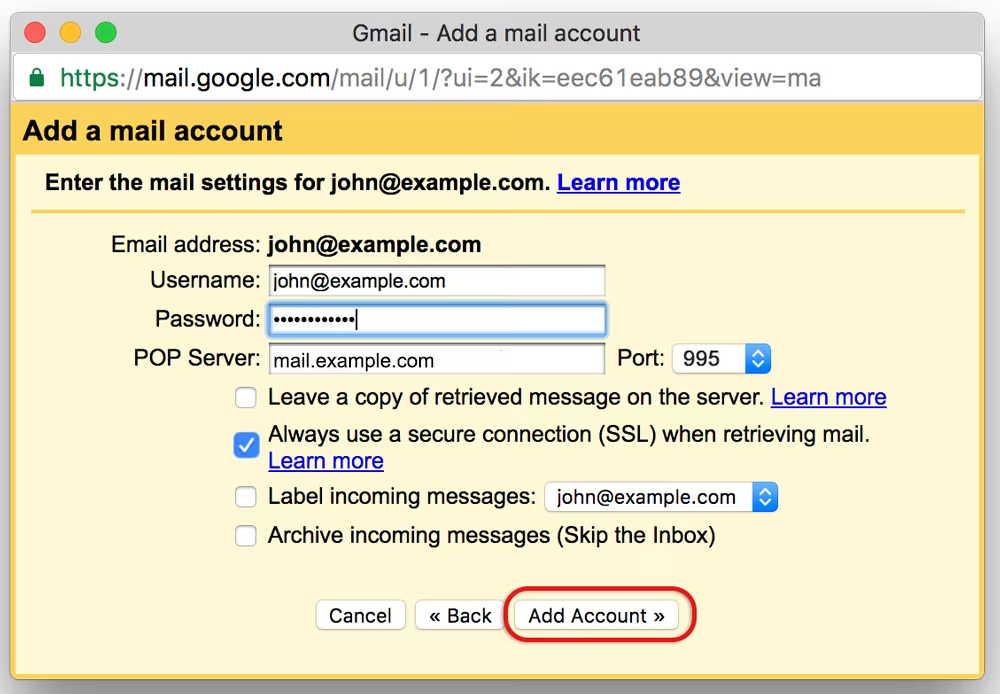
- Enter the POP settings: Username = your full email address, your Password, POP Server mail.yourdomain.co.za, Port 995, and tick Always use a secure connection (SSL). Click Add Account.
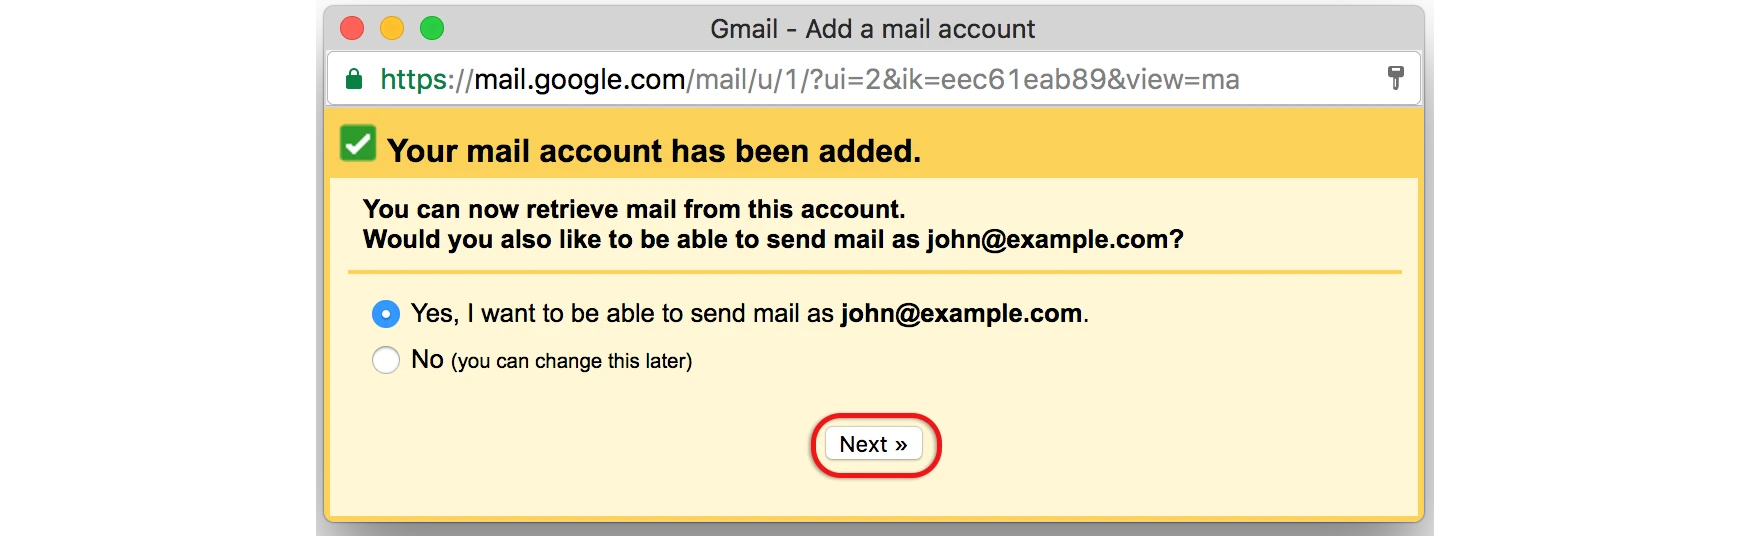
- When Gmail asks Would you also like to be able to send mail as…?, choose Yes and click Next.
- Enter the Name to show on the mail you send (leave Treat as an alias unticked) and click Next Step.

- Choose Send through your domain's SMTP servers and click Next Step.

- Enter the SMTP settings: SMTP Server mail.yourdomain.co.za, Port 465, your full email address and password, with Secured connection using SSL. Click Add Account.
- Gmail emails a confirmation code to your Texo address. Enter the code (or click the link in that email) and click Verify.

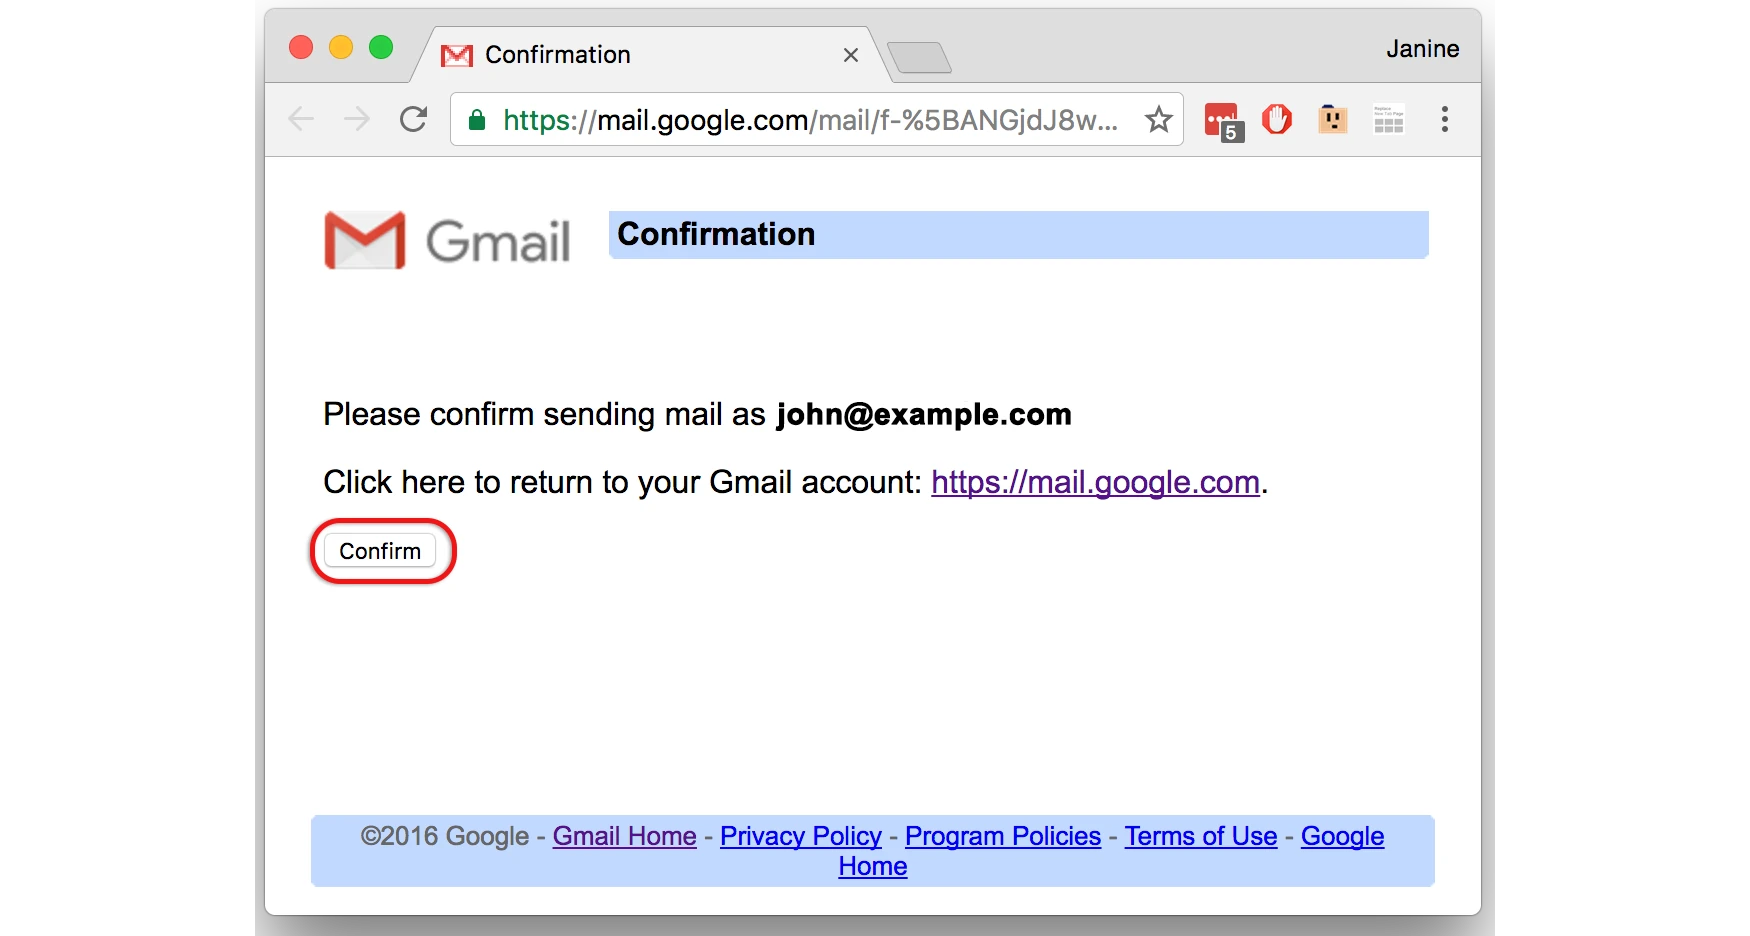
- If you open the confirmation email, click Confirm to finish.
Once verified, your Texo mail will start arriving in Gmail and you'll be able to send from your Texo address. If anything won't connect, double-check the password and ports above, then submit a support ticket.
Last updated 1 July 2026.
